Avatar Creation Process
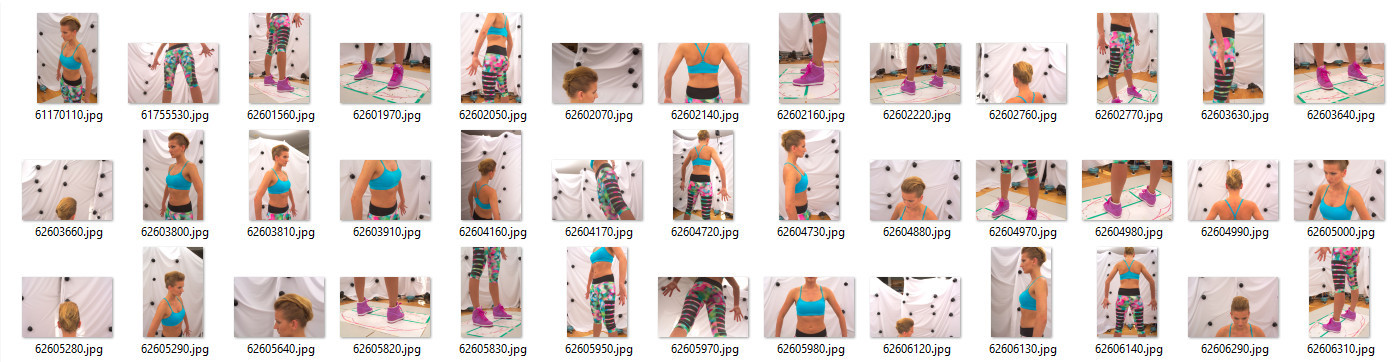
Using our DSLR camera rig, we take 82 photos within 1/600th of a second. A fast speed is necessary so we have sharp images and to ensure that all cameras have captured the subject with minimal changes between cameras. People tend to move even when told to keep still. This can be from breathing or from holding a difficult pose. The faster we can capture a pose, the higher the chance that all the photos between all the cameras match up perfectly.
We process these photos using photogrammetry to give us this 3D model.
-
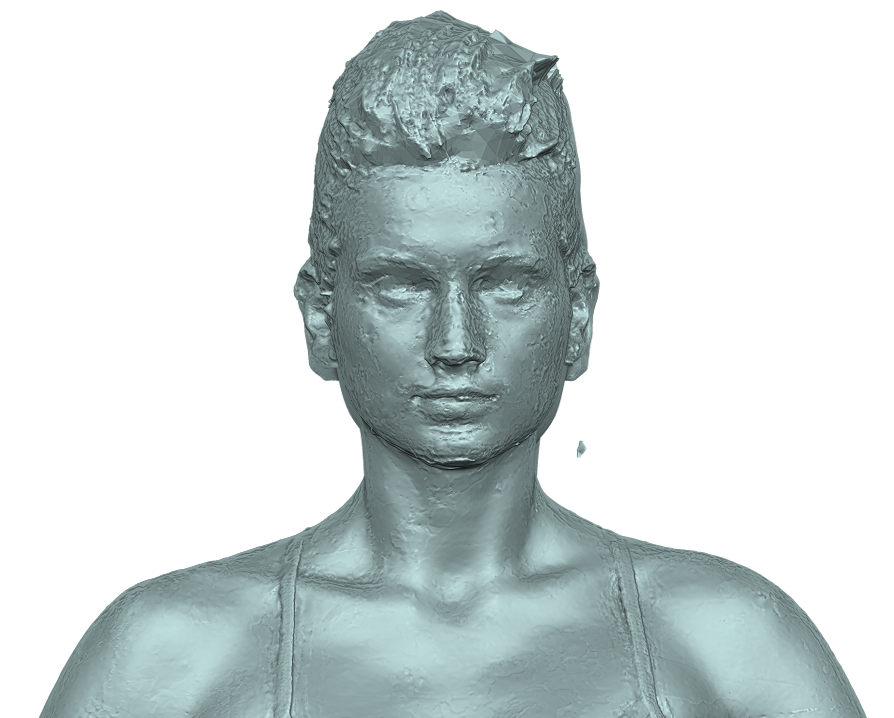
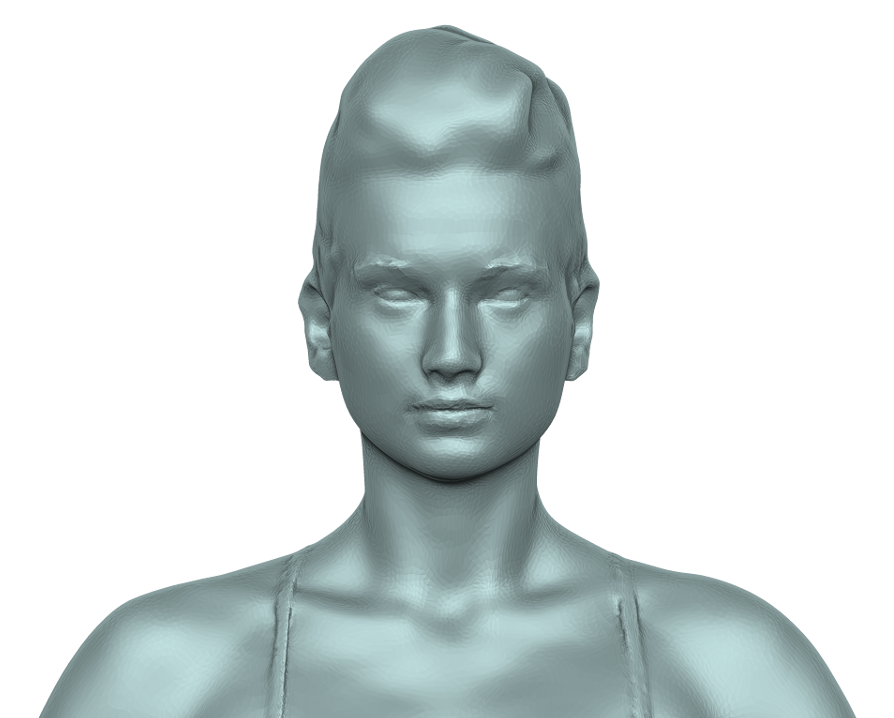
3D scans tend to come out looking like concrete and require some kind of polishing in order to make the surface more human-like. This is best done by hand since automated polishing tools tend to indiscriminately smooth everything which, in scanning terms, can result in a "potato" like appearance.
-
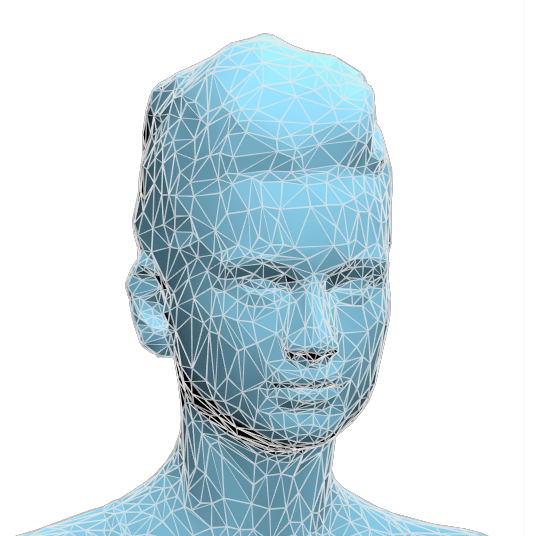
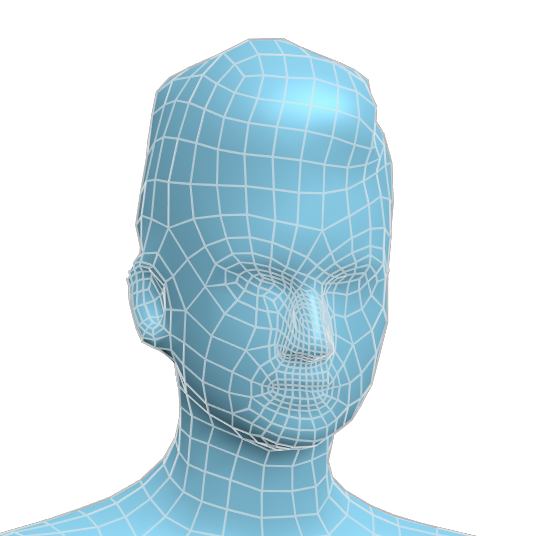
Once we have cleaned up the topology (a term for the surface of a 3D model) we end up with millions of random polygons in the form of triangles. This will result in an unnecessarily big filesize and would consume a lot of computer power to present to the screen.
To reduce the number of polygons we use a method called "re-topologisation" or "re-topo" for short. With this process we can reduce the number of polygons to 7,000 to be displayed on a web page. This is a highly optimised model. For film or photography we need more realism and there is no requirement for realtime motion, so we should aim for around 140,000 polygons. We need to be efficient with our use of polygons so we make sure to place smaller polygons in areas requiring finer details, like the face, and we use larger polygons for areas like the legs and torso. If our character is to be animated we will add more polygons to the bodyparts that bend and twist.
|
|
Now we use photogrammetry software to create a texture.
-
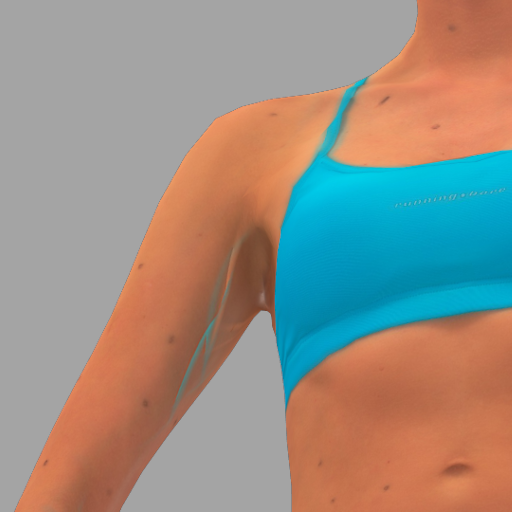
As you can see, we sometimes get areas of the texture that need cleaning up. These are usually areas where the cameras could not see, so the software has taken a guess at the colour in that area. After cleaning the texture we can have a look at the actual image file that stores the texture.
-
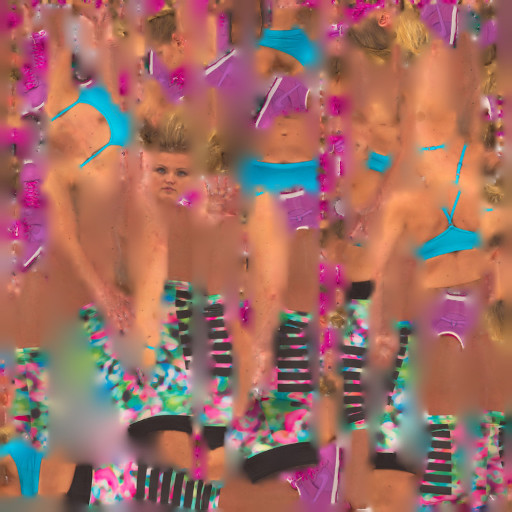
This is what the texture looks like straight from the photogrammetry software.
-
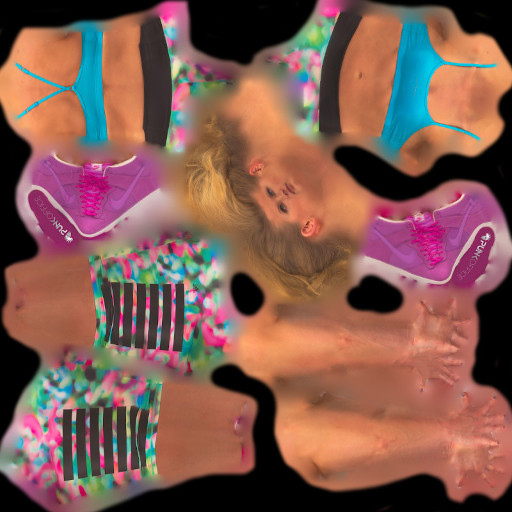
Does that make any sense to you? Didn't think so! The photogrammetry software cannot tell that this is a human and cannot differentiate between all their limbs. The 3D model itself may look perfectly fine, but the texture image is a jumbled mess. This would make it very hard for a graphic designer to change parts of the texture, like for instance, if they wanted to change the eyes to black or add a fake tattoo on the leg. We use a 3D editing program to manually separate the body-parts into an easy-to-edit texture image. Here you can clearly see the different body-parts. It might look a bit weird, but that's because we've had to flatten out a 3D object onto a flat 2D image file.
-
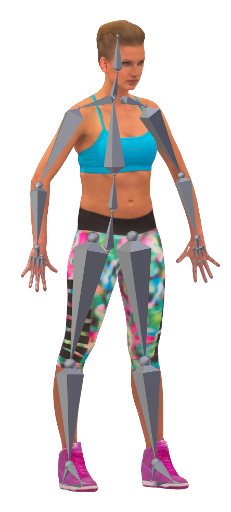
We now have a 3D model ready to use in an app or to display on a web page. However, some people require these 3D models as avatars which can be animated. How is it possible to move every single polygon in a way that simulates a walk cycle or flying kick? We can do this through the process of "rigging". This is where we apply a skeleton (or armature) to the 3D model. The reason we make the model stand in an "A" pose is because it makes it easy to add a skeleton. All limbs are clearly separated from eachother and that makes it easy to add individual bones. We would prefer a "T" pose where the arms are pointing straight out to the side, however scanning a person in "T" pose requires a larger scanning area which reduces resolution and can cause focusing issues.
-
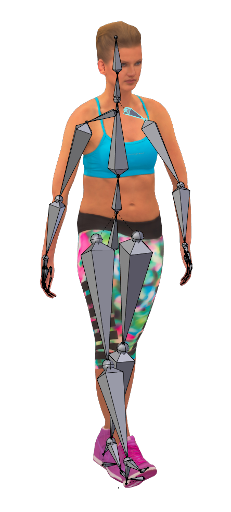
Once we have the bones in place and we have bound it to the 3D model, all we have to do is move a bone to effect that whole limb.
-
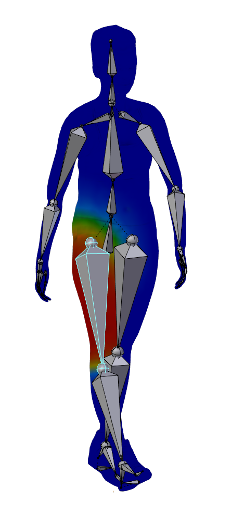
Sometimes when you move a limb you end with strange and unrealistic deformations of the skin. The 3D editor doesn't know if you're bending a forearm or whole arm. It doesn't know how skin stretches and how muscles flex. It just makes a guess. You can fix this by changing "skin weights". These weights are colours that tell that surface area how much it is influenced by a moving limb. We usually end up with unrealistic warping around the armpits which require some manual weight painting.
THAT'S IT!!! You can repose the model to whatever position you want it in or you can apply animations as long as those animations are made for the same skeleton. Below is an example of using the 3D scan as an avatar in a web-based virtual world.
Getting more detail
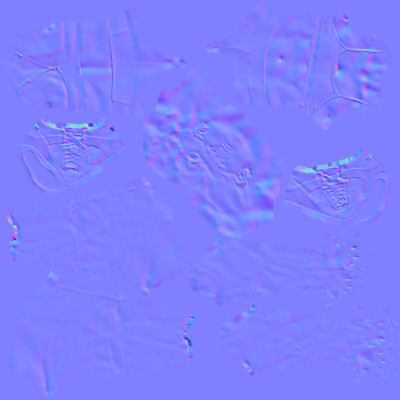
Sometimes having a small number of polygons can noticeably cause or decrease in detail in the surface of the model. This can happen because of the large polygon sizes. If this is the case, we create a "normal map" for that model. This is a texture which gives information on the bumps and crevices on the surface of the model. It looks similar to a texture map, but appears with a blue tinge. This is a special encoding which can be interpreted by 3D frameworks. This does increase the filesize of the whole 3D model package so we only use it if the current 3D model appears unrealistically smooth.
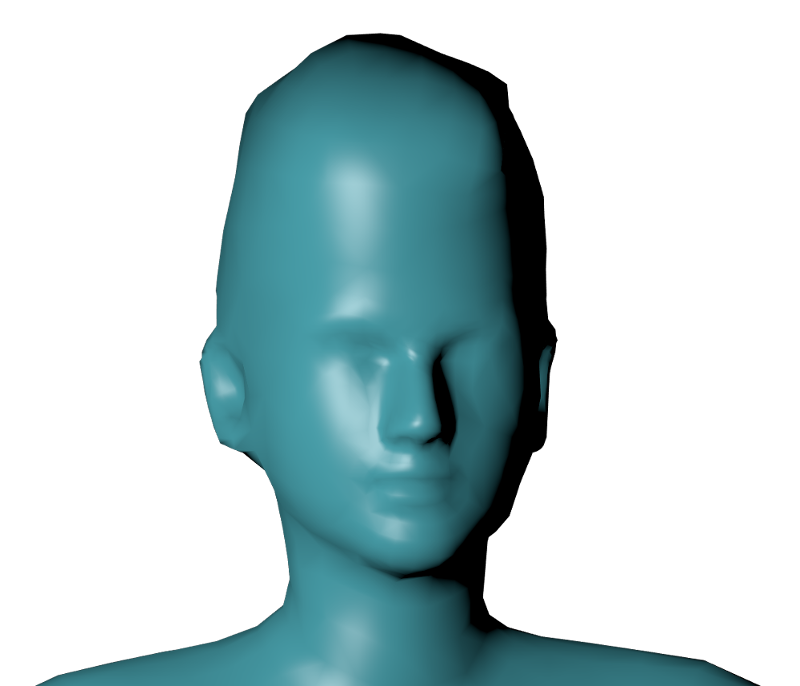
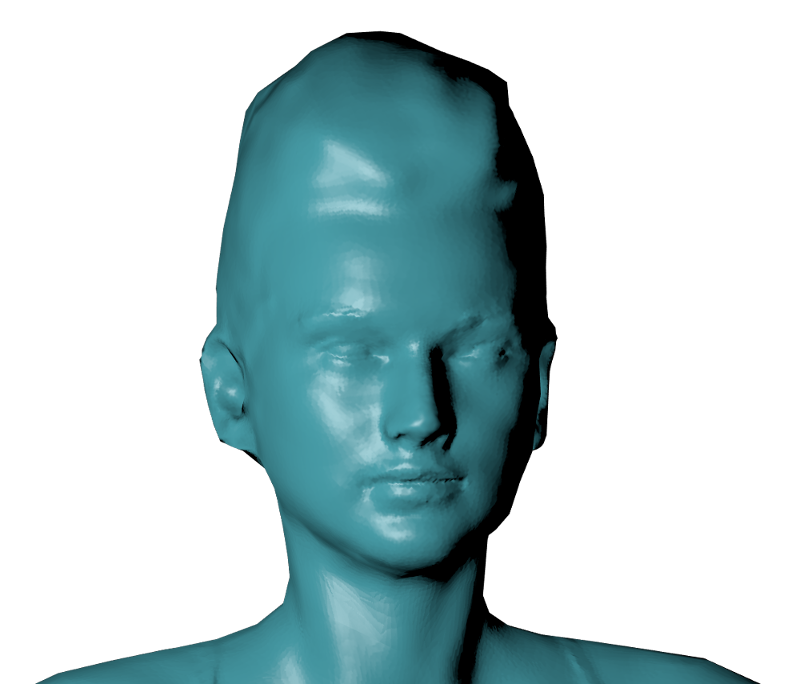
The result can be demonstrated here. The left image has no normal map applied and appears really smooth. The right image has a normal map applied and appears to show more detail. They both have the same number of polygons.
|
|
Adding more features to improve rendering
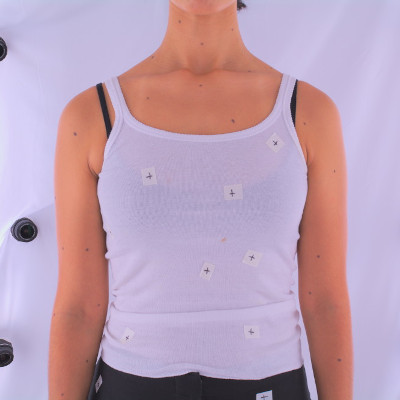
Photogrammetry works by matching features in each photo. A feature can be a corner or just a dot. The more features that appear on a person, the easier it is to match the photos and form a more accurate 3D model of the person being scanned. If a person has very clear skin, void of tattoos and moles, we will add features by using an eye-liner pen to draw on their skin. We also add masking tape with crosses to clothing if the clothing is devoid of any features. This is common with clothing that is all one plain colour.